I suffer intense performance pressure when I contemplate making Medovik, Russia’s beloved multi-layer honey cake. I’m cognizant that this is, hands down, every Russian’s absolutely favorite cake, ever since Alexander I’s wife, Empress Elizabeth, a confirmed honey hater, fell in love with a Medovik made by a new chef in the palace kitchen blissfully unaware of his imperial mistress’s tastes.
There is, as well, the almost religious zeal with which Russians treat their honey. Anyone who has ever visited a Russian farmer’s market knows there are almost as many kinds of honey in Russia as there are mushrooms, that other great culinary obsession. At the market the jars stand in ascending chromatic order: from the palest, almost transparent yellow to the densest darkest brown. I always enjoy a natter with the knowledgeable honey salespeople, who dispense advice on the best choices for cooking or medicinal use, while also dolling out generous free samples on folded strips of paper. This is organic honey at its best, and in the sticky mouthfuls you can taste wildflowers and herbs.
Perhaps the weight of history also intimidates me: beekeeping has been around in Russia since ancient times, and is still a popular occupation today, which reaches fever pitch in the autumn at Moscow’s annual honey festival. In the medieval era, honey and beeswax, along with furs and captive blond-haired Slavs eventually dubbed “slaves,” were prized commodities on the North/South trade routes of the Volga and Dnieper. Long before there was sugar in Russia, honey was used to make sweet cakes and distilled into mead and kvass, the latter skill practiced by monasteries then as it still is today. Honey is a long golden river running through Russia’s culinary history.
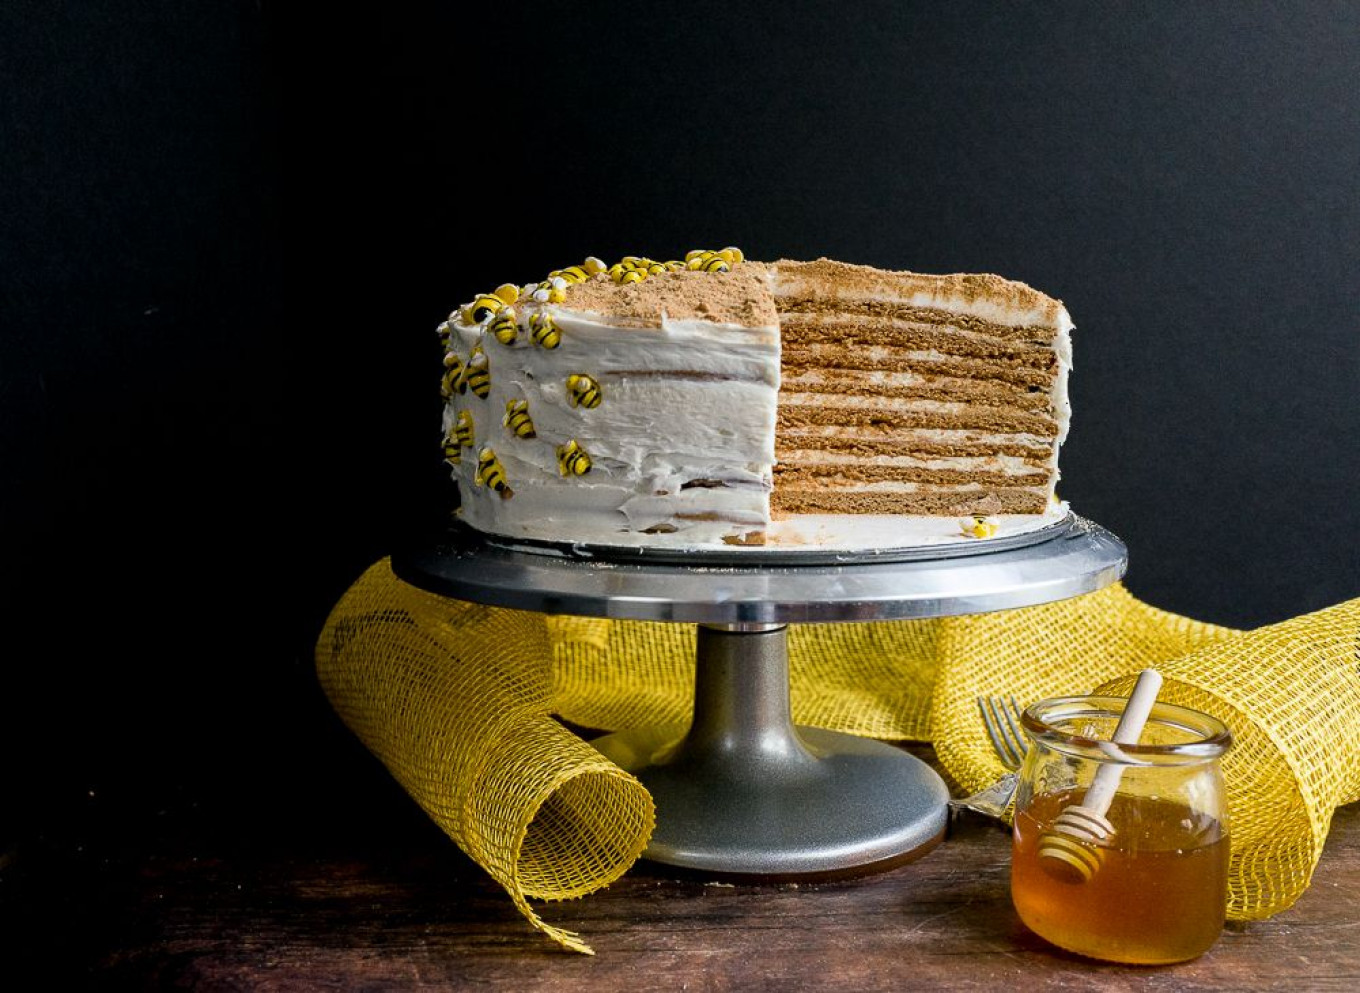
But my primary performance pressure anxiety stems from the complexity of Medovik, which pairs honey with that other Russian staple, sour cream in a lofty confection of some 8-12 flat cake layers, stacked between a tangy frosting of sour cream, whipped cream, butter, and honey. The frosting soaks into the cake layers after a long chill, making it delightfully moist and soft. Traditionally sprinkled with crushed cake crumbs on the outside, the complexity of a Medovik is only revealed after a slice is cut, revealing its impressive number of layers.
When I first came to Russia, I was quite bowled over by the cake scene — until, that is, I actually tasted one. Russian cakes were absolutely perfect, their stiff frosting piped to perfection with impeccably constructed, complicated embellishments of flowers, birds, or exquisitely piped lettering spelling out effusive congratulations for some holiday or other. It always seemed, as someone sitting around the table invariably remarked, “such a shame to cut into it.” And that was always true, because after the cake was cut, revealing perfectly symmetrical layers often mortared together with what looked like ganache, jam, or cream fillings, the cake turned out to taste exactly like spun lard. Cakes in those perestroika days were mirages that lulled the populace into a false sense that everything was okay. One taste revealed that nothing about them was remotely okay: vegetable oil instead of butter, corn syrup for honey or sugar, and I had my suspicions that in the place of all-purpose flour, the bakers of the twilight of the Soviet era used substitutes that ranged from cotton wool to sawdust.
And yet, no celebration was complete without one of these Potemkin cakes, transported with the utmost reverence in plastic carriers as elaborate as their contents, and presented as fitting tributes for birthdays and holidays.
In those days, it never occurred to me to undertake making such a cake — I was too busy trying to avoid having to eat them – and I was quite content to leave it to the experts. Occasionally I longed for a proper layer cake, and wondered why I shouldn’t attempt to make one, but an expat chef friend told me once that Russian sugar was far too heavy for classic cake baking, and this kept my sifter and cake pans on the top shelf for almost a decade.
It was a Medovik that changed all this. One summer in Kostroma, I finally tasted a proper one, made from thick, tangy, fresh sour cream, and honey from the hostess’s own apiary. The company, gathered around a rickety wooden table in a sun-drenched dacha garden, was small and congenial, and it seemed churlish to refuse the cake when it was brought to the table with a bowl of fresh strawberries. Thank goodness for good manners! This Medovik was robustly spiced with a hint of caramel, the sour cream filling was thick and creamy, not too sweet with just the right hint of honey, and the entire thing was beyond delicious. The hostess swore it wasn’t hard, and she kindly wrote out the recipe for me, which I tucked it away for future reference.
The cake situation in Russia has, of course, improved beyond all recognition, and while spun lard cakes are still around, so too are wonderful bakeries with delectable pastries, cookies, and cakes, including all manner of creative interpretations of the Medovik. An exquisitely decorated cake remains an essential part of every Russian festivity, and Medovik remains a firm favorite with all ages. Making your Medovik from scratch will always endear you to any Russian, and the Kostroma beekeeper was correct: they are not actually complicated. Time-consuming, yes, complicated, no.
Time is a key ingredient in this recipe, which I’ve developed from various sources including the Kostroma beekeeper, Tatiana Ignatievna: the cake needs to chill overnight to allow the sour cream frosting to soak into the thin cake layers. Each layer cooks for only 8 minutes but depending on the size of your oven and sheet pans, they may need to be cooked consecutively. The cake dough is remarkably pliant, and you can let your inner artist go to town on the decoration. The butter in the frosting is my own addition, after I opened my fridge one morning to find the top four layers of a Medovik sliding off the bottom four. Take the time to “burn” the honey — which deepens both the color and the flavor of the cake. But above all, for best results, use the very best quality ingredients you can get your hands on. This is a short list of ingredients and their quality will really shine through in the finished product.
But hey, no pressure, right?
Ingredients
For the cake
- 1 cup (300 grams) natural honey
- 1 cup (200 grams) granulated sugar
- 18 Tbsp (260 grams) unsalted butter
- 6 eggs
- 1 ½ tsp vanilla
- 4 Tbsp baking soda
- 1 tsp salt
- 2 tsp cinnamon
- 2 tsp ground ginger
- 1 tsp ground cloves
- 2 tsp allspice
- ½ tsp fresh ground pepper
- 8 cups (1080 grams) all-purpose flour
For the frosting
- 2 ½ cups (600 grams or 580 ml) sour cream
- ¼ cup (85 grams) honey and 50 grams “burnt” honey
- 12 Tbsp (180 grams) very soft unsalted butter
- ¾ cup (100 grams) powdered sugar
- 1 ½ cups (340 grams) heavy whipping cream*
*Tip: chill the bowl you plan to use for whipping the cream along with the beaters for best results.
- Cream the butter, remaining “burnt” honey (if it is too stiff, heat it again and add another tablespoon of water), the “unburnt” honey, and powdered sugar in the bowl of a standing mixer until smooth. Fold in the sour cream in three additions. Fold in the heavy cream. Keep the frosting refrigerated until you are ready to frost the cake.
- Place ½ cup (125 ml) of frosting on top of a cake layer, then spread it to the edge with an offset knife or spatula. Add the next layer on top and continue to stack the cake with frosting between each layer. Frost the sides and top with a thin layer of frosting, reserving the rest for the final frosting. The layers can slip and slide; if they have, adjust them gently with two spatulas. To keep the cake from slipping and sliding as it chills, wrap a piece of parchment paper, cut to the height of the cake, all around its circumference. If you have a cake shaper or spring-form pan, that is slightly larger than the cake, place it around the cake. Chill the cake overnight (8-12 hours).
- Frost the cake with the remaining frosting. Sprinkle the top (and sides, if you wish) with the crumbs you make from the scraps of cake layers. Serve immediately. Keep any leftovers in the fridge!
Recipe adapted from Tatiana Ignatieva, The Cooking Tree, and Chef John.